Classic Risotto (w/ Shrimp)

Risotto with Shrimp in Staub
*Post sponsored by Staub Cookware…jk  🙂

Risotto is one of those recipes that elicits respect. It takes a little bit of TLC, all of that stirring. Risotto is needy. You can’t leave it unattended too long. And it is key to be patient when adding the stock. Too much liquid at one time can completely derail the dish. So be prepared to stand over your saucepan and enjoy the cooking magic of this ever absorbing rice. But, all in all, it is a fairly easy dish to whip together and can definitely be concocted in under one hour. Skip shrimp to make it even simpler! The risotto is delicious enough to stand on its own and will still impress.

We suggest consulting Action Bronson and Chef Michael White (of Marea, Osteria Morini, Ai Fiori, etc) for some professional risotto cooking tips. For our risotto, we used a super simple, straight forward recipe from the New York Times as our basis.

Ingredients:

  • 1 lb medium shrimp, in shell
  • 1 quart chicken stock
  • salt to taste
  • 2 TBS butter or olive oil
  • 2 shallots chopped
  • 1 1/2 cup arborio or carnaroli rice
  • 2 large garlic cloves, minced
  • 1/2 cup dry white wine
  • generous pinch of saffron (optional)
  • 2 TBS freshly chopped parsley
  • freshly ground pepper to taste

Directions:

  1. Shell and de-vein the shrimp. Set aside and salt them lightly. Rinse the shells and combine with 4-5 cups water. Bring to a boil, skim off the foam, reduce heat to low and simmer partly covered for 30 minutes. Strain and add to chicken stock. Bring the stock to a simmer in a saucepan.*
  2. Melt the butter in a large, wide saucepan and then add the shallots. Cook, stirring until the shallot softens, 3-5 minutes. Add a pinch of salt to the shallots and stir, and then add the rice and garlic. Cook, stirring, until the rice begins to crackle.
  3. Stir in the wine and cook over medium heat. You want the wine to bubble, but not too quickly. When the wine has just about evaporated, add a ladleful of the stock, enough to cover the rice. Stir often over medium-low heat. As the rice absorbs the stock, add additional ladlefuls. You want to add more stock once the previous ladleful has just about been absorbed. At some point, crush the saffron threads between your fingers and stir in. You should continue adding stock for about 20 minutes.
  4. After 20 minutes, taste a bit of rice. The rice should be a bit chewy, but definitely not hard in the middle. Continue adding stock until you reach this al dente stage (you likely will have a bit of leftover stock). When you think your rice is nearly perfect, stir in parsley and one more ladle of stock. Remove from heat, season with salt and pepper.
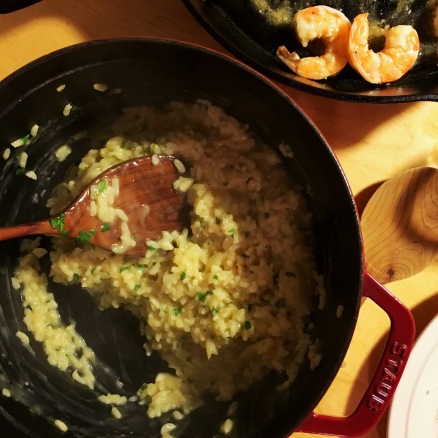
  5. We like to make the shrimp separately, but you can also add to the rice to cook. If cooking with the rice, when the rice is nearly finished, add the shrimp to the risotto with a ladle of stock and cook, stirring for 4-5 minutes, until the shrimp is pink. If you’d like to cook separately, heat 2 TBS of olive oil over medium-high heat in a pan. Add shrimp in an even layer and cook for 3 minutes. Turn shrimp and cook an additional 2 minutes. We recommend adding a spritz of lemon, splash of white wine when turning the shrimp.

Details: Serves 4

*Note: You can skip the shrimp and just purchase a bit more chicken stock. In this case, you’d be making delicious, classic risotto without the extra fuss of creating shrimp stock.

Dumplings! – Two Ways

dumplings homemade boiled and fried
Jiaozi your way – fried or boiled

Hillary and I are serious dumpling fanatics. There’s nothing quite like a meal of steamed, fried, or soup dumplings with a side of scallion pancakes. We love to visit Shanghai Deluxe (NYC) for soupies, Dim Sum Garden (Philly) for fried, and Thai Lake (Philly) for steamed. About three years ago, I tried my at hand at dumpling making – mostly so I could eat them whenever I wanted. I quickly learned that it’s too difficult an endeavor to have on-demand dumplings, which is probably a good thing for my health. However, this recipe is perfect for when you want to throw a dumpling party with friends or just want to make use of the rice wine/sesame oil/soy sauce that’s been sitting your panty.

Andrea Nguyen’s Asian Dumplings is the best starting point for newbie jiaozi/gyoza chefs.  However, there is one essential instruction Nguyen doesn’t stress enough. Don’t try to make the dumpling wrappers yourself! Make your life a thousand times easier and buy the 50 pack of wrappers from the Asian supermarket. Using the below recipes you can make either fried or boiled dumplings.

Ingredients

  • 2/3 lb ground pork
  • 1 cup chopped Napa Cabbage (only the leafy part)
  • 1/4 cup minced Chinese chives or scallions
  • 1 tsp freshly grated ginger
  • 1 1/2 TBS soy sauce
  • 1 TBS rice wine
  • 2 tsp sesame oil
  • 1 tsp fresh ground black pepper
  • 1/4 tsp salt
  • 1 package of round dumpling wrappers (I prefer Shanghai style)

Instructions

The Filling

  1. Peel and wash cabbage leaves. Slice the leafy part from the thicker stem. Chop the leafy parts until you have about 1 cup worth and place in a bowl. Generously salt the cabbage and let rest for 10 – 15 minutes.
  2. While the cabbage sits, prepare your pork mixture in a large bowl. Finely mince the chives and grate the ginger into the bowl. Add pork, soy sauce, rice wine, sesame oil, salt, and pepper. Mix together until everything is well incorporated.
  3. Return to the cabbage. This step is KEY!! Squeeze the cabbage using your hands, colander, and/or cheese cloth until most of the moisture is gone.
  4. Add cabbage to the pork mixture and fold everything together.

Making the Dumplings

  1. Prepare your wrappers, a bowl of warm water, and non-stick area for the dumplings.
  2. Put one wrapper in the middle of your palm and place a tablespoon of filling in the center. Using the tip of your finger rub the warm water around the edge of the wrapper.
  3. For Boiled: Make a “half-moon” fold by simply pressing together the edges of the wrapper to make a semi-circle shape.
  4. For Fried: Follow the same step as half-moon, but then make 3 or so pleats across the top of the fold.
  5. Set all your dumplings on a baking sheet/parchment paper and cover with a dish towel until your ready to cook.

Cooking the Dumplings

  1. For Boiled: While your making the dumplings, put a large pot of water to boil. Once the dumplings are ready drop them into the boiling water and stir them around so they don’t stick. Lower the heat and cook for 6 minutes. Remove dumplings one by one with a slotted spoon.
  2. For Fried: These babies are much more tricky than boiled! In a non-stick pan or wok add a 1 1/2 TBS mixture of canola oil and sesame oil. At medium-high heat, fry the dumplings for 2 minutes making sure the oil in evenly distributed. Reduce heat to low and add 1/3 cup water. Quickly cover the pan because the oil will start to pop violently. Keep the pan covered for 6 minutes more then remove lid and fry for an additional minute.

Details: You’ll probably get 25-30 dumplings worth. Enough for a tasty dinner and next day lunch!


Garlicky Lemony Anchovy Chicken

Garlic lemon anchovy chicken thighs Melissa Clark recipe
THIS is your weeknight chicken recipe

We love Melissa Clark. And Melissa Clark loves lemon, anchovies, garlic, capers, and chile flakes. Though not all chronicled here, we’ve made enough of her recipes to know these are her go-to pantry ingredients (see Salmon with Anchovy Butter, Fried Lemon Pasta, Seared Lamb Chops). And when a couple, or all, of these elements are combined, they do make for an incredibly quick, simple, and flavorful dinner. This chicken dish is so easy to make it’s almost shockingly delicious. Boring old boneless, skinless chicken thighs are transformed into succulent, tangy, salty, addicting goodness. Enjoy with a hunk of bread to sop up all that amazing pan sauce and you’ll be overwhelmingly satisfied.

Checkout Melissa’s recipe for video instruction!

Ingredients:

  • 4-6 boneless, skinless chicken thighs
  • 1 tsp salt
  • freshly ground pepper
  • 6 garlic cloves (5 smashed and peeled, 1 minced)
  • 1/4 cup olive oil
  • 5 anchovy fillets
  • 2 TBS drained capers
  • 1 large pinch chile flakes
  • 1 lemon, halved
  • freshly chopped parsley, for garnish

Directions:

  1. Heat oven to 350°F. Season chicken thighs with salt n’ peppa.
  2. Prep garlic, anchovies, and capers. Heat a large, ovenproof skillet over medium-high heat, then add the oil, smashed garlic cloves, anchovies, capers, and chile flakes. Let cook for 3-5 minutes, until garlic has browned around the edges. Stir with a wooden spoon to break up the anchovies (they will disintegrate).
  3. Add the chicken thighs and cook until nicely browned on one side, 5 to 7 minutes. Flip the chicken, place the pan in the oven and cook for an additional 5 to 10 minutes, until the chicken is cooked through.
  4. When chicken is done, remove from the oven. Transfer chicken to a plate and return the skillet to the stove on medium heat. Add the minced garlic and lemon juice and cook for 30 seconds. Return the chicken to the skillet and garnish with parsley.

Details: Serves 2-4 (maybe Luke and I were just really hungry but we each had at least 2 chicken thighs)

Pasta alla Norma

Pasta alla norma Mark Bittman recipe
Norma is not your normal pasta

We like heavy pastas in our household. Ragù. Spaghetti and meatballs. Pasta alla Gricia. We love the slow simmer, building of flavors, and richness of these dishes. And, yes, pasta is carbs. Carbs are comfort food. So why not, while you’re already eating something deemed “unhealthy,” pile on the prosciutto, guanciale, and sausage? But this vegetarian pasta, recipe courtesy of Mark Bittman, holds its own against our meaty favorites. Staring eggplant, it makes for a delicious, refined, and relatively quick dinner. And with a grating of ricotta salata and a sprinkling of freshly chopped herbs, it has an unbeatable fresh flavor. Enjoy as you’re easing out of summer! Save those heavier pastas for the upcoming cold.

Ingredients:

  • 1 large eggplant, cut lengthwise into thin slices (bit thinner than 1/2 inch)
  • salt & pepper
  • lots of olive oil, up to 1/2 cup
  • 1 TBS chopped garlic
  • 2-3 tsp chili flakes (depending on spice preference)
  • 1 28-oz can whole peeled tomatoes
  • 1 tsp dried oregano
  • 1 pound long pasta
  • 1/2 cup chopped parsley or basil (or combo)
  • 1/2 cup ricotta salata (or, if you must, pecorino Romano)

Directions:

  1. Preheat oven to 400°F.
  2. Sprinkle eggplant slices with 1-2 tsp salt and let drain of excess moisture. We do this by layering the slices in a colander and then placing a small plate weighed down with a can or big glass of water on-top, pushing down on the eggplant. We’ll let this sit for 20 minutes, patting the eggplant with paper towels afterwards. There are some other methods! This will prevent your eggplant from being soggy and bitter.
  3. After drying slices, arrange on a large, well oiled baking sheet. Brush with more olive oil and season with salt and pepper. Roast in oven for 20-25 minutes flipping at least once. You’ll went the eggplant slices to be nicely browned, soft, but with a good crisp.
  4. While eggplant is roasting, make the sauce and bring a large pot of salted water to a boil. In a large, deep skillet heat 2-3 TBS olive oil over medium heat. Once shimmering, add garlic and chili flakes, cooking until garlic has browned a bit and is fragrant. Add the tomatoes and juice, squeezing the whole tomatoes with your hand to crush, and oregano. Add a bit of salt and pepper. Bring to a boil and then simmer while eggplant and pasta finish cooking.
  5. Cook pasta until al dente. While cooking, cut the eggplant slices into strips. Transfer 1/4 of slices into simmering sauce. Set the rest aside.
  6. Add cooked pasta to tomato sauce.* Dress with remaining eggplant strips and a generous topping of freshly grated ricotta salata, basil, and/or parsley.

Details: Serves 4-6.

*Note: We like to keep the pasta and sauce separate and let people prep their own plates according to their sauce to pasta ratio preference. Not so traditional of us, but we are sauce-y people!

Panzanella with Mozz + Herbs

Panzanella mozzarella cheese Melissa Clark recipe
Panzanella, ella, ella, eh, eh, eh

There’s still time – tomato season isn’t over yet! This is a perfect end of summer salad. It combines some of our favorite seasonal ingredients, tomato, cucumber, and basil, with year-round essentials, namely cheese (mozzarella) and bread. On self-respecting nights, when we manage not to finish off a whole baguette, we let a portion go stale and make this delicious Tuscan bread salad the next evening for dinner.  Traditional panzanella calls for stale bread, uber ripe tomatoes, a dressing of olive oil and red wine vinegar, and sometimes onions and basil. This oomph-ed up version comes from our favorite lady Melissa Clark. The cucumber adds freshness and crunch and the mozzarella makes it a heartier salad, worthy of eating as a main meal instead of a side. Make sure to enjoy this salad before summer is officially over!

Ingredients:

  • 1/3 of a baguette or rustic loaf (preferably stale) cut into 1-inch cubes
  • 6 TBS olive oil
  • 1 tsp salt
  • 3 tomatoes, use a mix of varieties and colors!
  • 6 oz mozzarella, cut or torn into bite-sized pieces
  • 2 shallots (or 1/2 red onion) thinly sliced
  • 2 garlic cloves, grated to a paste
  • 2 TBS red wine vinegar
  • 1 TBS chopped fresh oregano or thyme (or a combination)
  • pinch of red pepper flakes
  • 1/2 tsp Dijon mustard
  • 1/2 cup Persian or English cucumber, cut into thin quarter pieces
  • 1/2 cup torn basil
  • 1/4 cup roughly chopped parsley
  • 1 TBS of capers, drained

Directions:

  1. Heat oven to 425ºF. Spread bread pieces onto a baking sheet and toss with 2 TBS olive oil and 1/2 tsp salt. Bake until golden brown and dried out, about 7-15 minutes. Cool on a wire rack.
  2. Cut tomatoes into pieces just a bit smaller than the bread cubes. Put them into a large bowl and then thinly slice the shallots lengthwise.
  3. Add the shallots into the bowl and use a microplane to grate 2 cloves of garlic into a paste. Along with the garlic paste, add 1 TBS vinegar, oregano or thyme, 1/4 tsp salt, and red pepper flakes.
  4. Cut up the mozzarella into bite-sized pieces and add to the bowl, toss everything together and set aside.
  5. In a medium bowl, combine 1 TBS vinegar, mustard, 1/2 tsp salt, and black pepper. While continuously whisking, add 4 TBS olive oil one-by-one to the dressing. Stir in cucumbers, basil, and parsley.
  6. Add bread pieces, dressing, and capers to the large bowl and mix well. Let it sit and soak for at least 30 minutes, up to 6 hours. You can keep chilled in the fridge. Add extra oil, vinegar or salt if needed!

Notes: Serves 3-4 as a main meal, 6 as a side.

Canelés de Bordeaux

Cannelés de Bordeaux Mimi Thorisson Trader Joes
Powder sugar perfection

Canelés are the perfect treat. They’re bite-sized, super sweet, crunchy and custardy. You can enjoy with a morning coffee, as an afternoon snack, or have a couple after dinner for a little sweetness. And when sprinkled with powdered sugar, they’re très photogenic – perfect for Instagram.  We discovered this recipe via Luke’s mother, who mastered making canelés by following a recipe in Mimi Thorisson’s A Kitchen in FranceProper French pastry chefs use copper molds, but a silicone mold (recommended by Mimi) makes life a lot easier. The only qualm we have with canelés is that they require some serious patience! You must make the batter at least 24 hours in advance. We suggest making the batter Saturday morning so that you can enjoy these little gems with Sunday brunch…and lunch, dinner, and midnight dessert!

Ingredients:

  • 2 cups + 2 TBS whole milk
  • 1-2 vanilla beans, split lengthwise and seeds scraped out
  • 1 cup granulated sugar
  • 1 cup all purpose flour
  • 3 large egg yolks
  • 2 TBS unsalted butter, melted
  • 1/4 cup dark rum (tip: we bought two mini bottles of Kraken Black Spiced Rum)

Directions:

  1. Note! Batter must be prepared at least 24 hours before baking, so plan ahead.
  2. In a medium saucepan set at medium-low temp, whisk together milk and vanilla seeds. Bring to a boil and remove from heat. Let it rest for 5 minutes then transfer to a large bowl.
  3. Whisk in the sugar and flour slowly, avoiding any lumps. Add egg yolks one at a time and mix until incorporated. Stir in the melted butter. Pour in the rum and whisk the batter until smooth. The batter should have the same consistency as palachinkes (aka crepes).
  4. Cover and refrigerate for 24 hours (can be up to 48 hours).
  5. Preheat the oven to 450°F.
  6. If using silicone canelés molds, you do not need to brush with butter. Copper/metal molds are trickier to use. Consult more professional canelés-makers for suggestions.
  7. Fill molds about to 2/3, be very careful to not fill too much. Bake at 450°F for 10 minutes then turn down the oven to 350°F and bake for additional 50 minutes.
  8. Let canelés cool in their molds for 5 minutes and then transfer to wire rack. Dust with powdered sugar when you’re ready to enjoy!

Details: Most silicon molds hold 15 or 16 canelés, we had a bit of batter leftover once our mold was filled.

Hot Honey Shrimp

hot honey shrimp NYT Food recipe
Spicy, sweet, speedy – delicious!

Shrimp dishes are the ultimate quick and easy dinner for two. We make shrimp when we’re feeling lazy, haven’t done grocery shopping for the evening, and there’s a sale at Whole Foods. Yes, we shop at Whole Foods…occasionally. It’s a guilty pleasure. To cook our fancy, albeit discounted, shrimp we look to two of our favorite chefs for guidance. Mark Bittman’s Simplest Best Shrimp Dish and Melissa Clark’s Hot Honey Shrimp are delicious – impossible to screw up – recipes that use few ingredients and can be thrown together in a matter of minutes. While Mark’s dish had been our go-to for years, Melissa’s recently wooed us with her perfect mix of sweet and spicy. A side of rice is an absolute must for each. If you’re fully committed to making this one the the easiest dinner meals ever, stop by your local Chinese spot for a takeout box of white rice.

Ingredients:

  • 1-2 TBS honey
  • 1/4 tsp cayenne
  • zest of 1 lime
  • 1/2 tsp finely grated ginger
  • 1 garlic cloves, grated (use Microplane or finely mince)
  • 1/4 tsp salt
  • 1/4 tsp freshly cracked pepper
  • 1 pound cleaned, deveined shrimp (the larger the better!)
  • 2 TBS cold butter, cut into small cubes (1 per shrimp)
  • lime wedges, for garnish
  • 1 jalapeño, thinly sliced, for garnish
  • 1 scallion, thinly sliced, for garnish

Directions:

  1. Heat oven to 450°F.
  2. In a medium bowl, combine honey, cayenne, lime zest, ginger, garlic, salt, and pepper. Toss in shrimp and mix until coated.
  3. Arrange shrimp on a large rimmed baking sheet and place a lil’ cube of butter on each shrimp. Roast until shrimp is pink and firm, about 5 minutes. Garnish with lime juice, jalapeño, and scallion.

Details: Enjoy as dinner for 2 or an appetizer for a intimate get together.

French Tomato Tart

Tomato Tart David Lebovitz recipe
Tomatoes and the tart! Perfect for a picnic.

Luke’s dad Scott is a masterful tomato grower. In a small community garden plot in Philadelphia Scott has harvested many pounds of tomatoes, a combination of varieties he carefully selects – Speckled Peach, Amish Paste, Marmande, Golden Honey Bunch are a few of his favorite. He’s truly perfected the science of tomato growing, even conducting taste tests. In past summers, Luke and I have had the privilege of enjoying Scott’s tomato bounty, making oodles of bruschetta, homemade tomato sauce, Caprese salad – gustatorily transporting ourselves to Italy. This year, in accordance with fairness and good governance, Scott’s community plot has been ceded to another gardener. And sadly, without Scott’s crop, Luke and I have completely forgotten to enjoy any of summer’s tomatoes! Thankfully, that changed this weekend. We selected three beautiful farmer’s market tomatoes and journeyed from Italy to France. This fresh, bright tomato tart makes a perfect summer lunch or light dinner. Bring to the park for a Provençal picnic!

Recipe courtesy of David Lebovitz – a classic food blogger, but new favorite!

Ingredients  – Dough:

  • 1 1/2 cups flour
  • 9 TBS chilled butter, cut into 1/2 inch cubes
  • 1/2 tsp salt
  • 1 large egg
  • 2-3 TBS ice water

Ingredients – Tart filling:

  • 2-3 TBS dijon mustard
  • 2-3 large ripe tomatoes, cut into slices
  • 2 TBS olive oil
  • 2 TBS minced fresh herbs (thyme, chives, tarragon)
  • 6 oz goat cheese, cut into rounds
  • salt & pepper, to taste

Directions – Dough:

  1. Tart dough: Mix flour in salt in a medium sized bowl. Add the butter and use your hands or pastry blender, to break in the butter until the mixture is crumbly.
  2. Mix the egg with 2 TBS of cold water. Make a well in the center of the dough and add the beaten egg mixture. Stir the mixture with your hands until the dough holds together. If it’s not coming together easily, add an additional TBS of water.
  3. Form dough into a ball and transfer onto a big sheet of plastic wrap. Wrap in plastic and flatten into a disc. Refrigerate for an hour (or up to 24 hours).
  4. Remove dough from fridge and let thaw out slightly. On a lightly floured service using a floured rolling pin, roll out the dough. Rotate the dough and add more flour to surface, as needed, to ensure dough doesn’t stick. Roll out dough so that is large enough to cover the bottom and sides of a 9-inch or 10-inch removable tart pan.
  5. Transfer the dough to your tart pan and press the dough into the bottom and up the sides of your pan.

Directions – Filling:

  1. Preheat oven to 425°F.
  2. Spread an even layer of mustard over the bottom of the tart pan and let sit for a minute or so to soak in.
  3. Arrange the sliced tomatoes in a single layer (a little overlap is ok). Sprinkle with 1 TBS of fresh herbs and drizzle with olive oil. Top with salt and a freshly ground black pepper.
  4. Arrange the goat cheese slices on top and sprinkling with remaining herbs.
  5. Bake the tart for 30 minutes, until the cheese is nicely browned around the edges. Let cool for ten minutes, then enjoy! Perfect for a summer lunch.

Details: Makes 1 9-inch or 10-inch tart

Peach + Blackberry Crumble Pie

Peach blackberry crumble pie Melissa Clark recipe
Enjoy for dessert tonight and breakfast tomorrow

This past weekend, Luke and I celebrated the Fourth of July in Philly. With Luke’s parents away on vacation we had the whole house to ourselves. Comfy bed, lil’ backyard with a BBQ, washer and dryer, big screen TV – it was heavenly. The best part of all: the kitchen and all of it’s wonderful appliances, namely, the Cuisinart food processor. I’m always afraid that making pie crust in our tiny BK apartment will be a complete disaster. And currently we don’t have the space or the shekels for a proper food processor. So all last week I had been looking forward to making a pie, homemade crust and all. And it was delicious. We enjoyed for dessert, breakfast, late night and afternoon snacks all weekend long.

This recipe is adapted from one of our favorites, Melissa Clark. The original recipe includes a very helpful video if you’re a relatively novice pie crust maker like myself.

Ingredients – Crust (yields 2 9-inch crusts):

  • 2 1/2 cups all purpose flour
  • 3/4 tsp salt
  • 2 1/2 sticks cold, unsalted butter, cut into 1/2-inch cubes
  • 6-8 TBS ice cold water

Ingredients – Filling:

  • 1 lb ripe peaches (about 3 medium peaches), cut into 1 1/2 inch chunks
  • 2-3 cups blackberries
  • 3/4 cup brown sugar
  • 1 1/2 TBS corn starch
  • zest of 1 lemon
  • 2 tsp lemon juice

Ingredients – Crumble:

  • 3/4 cup all purpose flour
  • 1 cup oats
  • 1/2 cup brown sugar
  • 1 tsp cinnamon
  • 1/4 tsp cardamon
  • 1/4 tsp nutmeg
  • pinch of salt
  • 6-8 TBS unsalted butter, cubed

Directions – Crust:

  1. In a food processor, combine flour and salt and briefly pulse. Add butter and pulse until mixture forms chickpea/lima bean sized pieces (you don’t want it to be too grainy). Add ice water, 1 TBS at a time, and continue to pulse until mixture is just moist enough to hold together. You’ll know you’ve added enough water when you take some dough, pinch it, and it holds together. Dump contents onto a big sheet of plastic wrap and form dough into a large ball. Wrap with plastic wrap and flatten into a disk. Refrigerate for at least 1 hour.
  2. You’ll have enough pie crust for either a 9-x-13-inch baking dish or 2 9-inch round pie pans or an 8-x-8-inch baking dish and a 9-inch pie pan. For this recipe, we used half for an 8-x-8-inch baking dish to make a sort of slab pie and saved the other half. You can double the filling if you want to make a giant 9-x-13-inch slab pie. You’ll have lots of leftovers!
  3. Using a lightly floured rolling pin, roll out half of dough into a roughly 10-x-10-inch rectangle. Transfer to lightly greased 8-x-8-inch baking dish and press crust into bottom of the dish and up the edges so it’s flush with the top of the pan. Return crust to the fridge while you make the filling and crumble.

Directions – Filling:

  1. In a medium sized bowl, toss together peaches, blackberries, sugar, corn starch, lemon zest, and lemon juice. Let sit for 20-30 minutes.
  2. Meanwhile, preheat oven to 425°F. Arrange one rack on the lowest position and the other in the center.

Directions – Crumble:

  1. Whisk together flour, oats, sugar, cinnamon, cardamon, nutmeg, and salt. Mix in butter with fingertips until the mixture is uniformly moist and comes together in large clumps.

Directions – Assemble and Bake:

  1. Spoon filling into crust and create a mound. You want more filling in the middle, so aim to create a small, slopping hill. Top with crumble, which you’ll have to gently press into the filling to make sure it clumps together and is evenly distributed. Place on lowest rack and cook at 425°F for 15 minutes. Reduce temp to 375°F and move pie to center rack. Cook for 1 hour more, or until pie is golden brown and filling is bubbling. Transfer to a wire rack and let cool completely before slicing and serving.