Charlie Bird’s Farro Salad

Charlie Bird Farro Salad recipe
A salad to celebrate spring

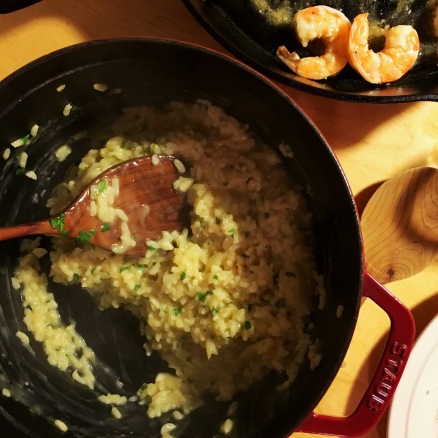
Charlie Bird is one of those New York restaurants. It’s been around for over ten years!! That’s a feat in New York. And it still manages to have a newfangled feel. Lots of fresh ingredients, incredibly inventive dishes. The food is delicious. But…Charlie Bird is one of those New York restaurants – small plates, not so small prices. Luke and I have been only once and it was when my parents were in town. Special dinner for a special occasion. Our lives and salaries don’t really warrant dinners at Charlie Bird. Prior to our dinner, having done my research, I knew the farro salad was a Charlie Bird favorite. But sitting down for dinner and perusing the menu, there were so many other amazing options. Farro, being a humble grain, just wasn’t all that appealing! I don’t regret this decision. Dinner was perfect. And thanks to Melissa Clark, we were able to replicate the farro salad at home. Though we could never claim that our version is as good as Charlie Bird’s, we both were able to enjoy very sizable portions!

Ingredients:

  • 1 cup farro
  • 1 cup apple cider
  • 2 tsp kosher salt + more to taste
  • 2 cups water
  • 2 bay leaves
  • 6 TBS olive oil
  • juice of 1 small lemon (about 3 TBS)
  • about 1/3 cup shaved parm (you can use a vegetable peeler to shave)
  • 2 big handfuls of arugula
  • 1 cup parsley, roughly chopped
  • 1 cup mint, roughly chopped
  • 3 radishes, thinly sliced
  • 3/4 cup cherry tomatoes, halved

Directions:

  1. In a medium saucepan, bring farro, apple cider, water, salt and bay leaves to a simmer. Simmer until farro is tender (it will still have a little bit of chew) and the liquid has evaporated, about 30 minutes. If the liquid evaporates before the farro is done cooking, add a bit more water. Let farro cool and then discard the bay leaves.
  2. In a salad bowl, make the dressing. Whisk together lemon juice, olive oil, and a pinch of salt. Add cooled farro and cheese and mix well. This mixture can sit for a couple of hours at room temperature, or overnight in the fridge. When ready to eat, mix in the arugula, herbs, tomatoes, and radishes. Top with flaky sea salt, to taste.

Details: Serves 4-6. This is a hearty salad and can be eaten as a main course! Serves 4 as a main, 6 as a side.


Classic Risotto (w/ Shrimp)

Risotto with Shrimp in Staub
*Post sponsored by Staub Cookware…jk  🙂

Risotto is one of those recipes that elicits respect. It takes a little bit of TLC, all of that stirring. Risotto is needy. You can’t leave it unattended too long. And it is key to be patient when adding the stock. Too much liquid at one time can completely derail the dish. So be prepared to stand over your saucepan and enjoy the cooking magic of this ever absorbing rice. But, all in all, it is a fairly easy dish to whip together and can definitely be concocted in under one hour. Skip shrimp to make it even simpler! The risotto is delicious enough to stand on its own and will still impress.

We suggest consulting Action Bronson and Chef Michael White (of Marea, Osteria Morini, Ai Fiori, etc) for some professional risotto cooking tips. For our risotto, we used a super simple, straight forward recipe from the New York Times as our basis.

Ingredients:

  • 1 lb medium shrimp, in shell
  • 1 quart chicken stock
  • salt to taste
  • 2 TBS butter or olive oil
  • 2 shallots chopped
  • 1 1/2 cup arborio or carnaroli rice
  • 2 large garlic cloves, minced
  • 1/2 cup dry white wine
  • generous pinch of saffron (optional)
  • 2 TBS freshly chopped parsley
  • freshly ground pepper to taste

Directions:

  1. Shell and de-vein the shrimp. Set aside and salt them lightly. Rinse the shells and combine with 4-5 cups water. Bring to a boil, skim off the foam, reduce heat to low and simmer partly covered for 30 minutes. Strain and add to chicken stock. Bring the stock to a simmer in a saucepan.*
  2. Melt the butter in a large, wide saucepan and then add the shallots. Cook, stirring until the shallot softens, 3-5 minutes. Add a pinch of salt to the shallots and stir, and then add the rice and garlic. Cook, stirring, until the rice begins to crackle.
  3. Stir in the wine and cook over medium heat. You want the wine to bubble, but not too quickly. When the wine has just about evaporated, add a ladleful of the stock, enough to cover the rice. Stir often over medium-low heat. As the rice absorbs the stock, add additional ladlefuls. You want to add more stock once the previous ladleful has just about been absorbed. At some point, crush the saffron threads between your fingers and stir in. You should continue adding stock for about 20 minutes.
  4. After 20 minutes, taste a bit of rice. The rice should be a bit chewy, but definitely not hard in the middle. Continue adding stock until you reach this al dente stage (you likely will have a bit of leftover stock). When you think your rice is nearly perfect, stir in parsley and one more ladle of stock. Remove from heat, season with salt and pepper.
  5. We like to make the shrimp separately, but you can also add to the rice to cook. If cooking with the rice, when the rice is nearly finished, add the shrimp to the risotto with a ladle of stock and cook, stirring for 4-5 minutes, until the shrimp is pink. If you’d like to cook separately, heat 2 TBS of olive oil over medium-high heat in a pan. Add shrimp in an even layer and cook for 3 minutes. Turn shrimp and cook an additional 2 minutes. We recommend adding a spritz of lemon, splash of white wine when turning the shrimp.

Details: Serves 4

*Note: You can skip the shrimp and just purchase a bit more chicken stock. In this case, you’d be making delicious, classic risotto without the extra fuss of creating shrimp stock.

Jam Cookies for XMAS


Jam cookies Christmas
~ * ~* * Little Jewels ~ * ~* *

Impress your friends and Instagram followers with these jam cookies, or as they’re formally referred to, Linzer cookies. Post a pic of a platter of these beauties on your Insta and you’ll have people thinking you’re the millennial Martha Stewart (pro tip: they look even better with a sprinkling of powder sugar). They require some concentration and patience to make, but are simpler than you may think. Just make sure you have the proper tools and plenty of jams for an assortment of colors. With these cookies you’ll be celebrating XMAS in style!

Ingredients:

  • 6 TBS unsalted butter, softened
  • 1/2 cup granulated sugar
  • 1 egg
  • 1/2 tsp vanilla extract
  • 1 1/2 cup all purpose flour
  • 1/2 tsp baking powder
  • 1/2 tsp salt
  • a variety of jams + powdered sugar (the latter is optional)

Directions:

  1. In a medium sized bowl, cream together butter and sugar until pale then beat in egg and vanilla.
  2. In another bowl, mix together dry ingredients (flour, baking powder, and salt). Add the dry ingredients to the butter and eggs, mixing in the dry in three batches. It’s ok if the dough is a wee bit crumbly, better crumbly than sticky.  You can add more flour (sparingly) if too sticky.
  3. Divide the dough into two balls and then flatten the balls into disks.  Wrap the disks in plastic wrap and refrigerate for at least 1 hour.
  4. Meanwhile…Preheat oven to 350°F.  Line 2 baking sheets with parchment paper (or use non-stick sheets). Prepare a lightly floured surface to roll out dough.
  5. Take one dough disk, place on your floured surface and roll out.  You are aiming for an even 1/4 inch thickness. Use your Linzer cookie cutters to cut the bottom circles.  Collect the remaining scraps of dough, re-roll, and cut out more bottom circles.  You’re aiming to make around 25 bottoms.  Transfer to your baking sheet as you go along.  Once you’ve sufficiently used up your first disk of dough, bake the bottoms for 8-10 minutes, until the edges begin to brown.
  6. Repeat the above with your second disk, this time using the Linzer cookie cutters with the cut-out shapes to make the top circles.*
  7. When the tops and bottoms are cool, assemble!  Take your circle cookies (these have no cut out shape) and spread jam (a little more than 1/2 tsp) on the bottom of the cookie (the “bottom” is the smoother, more even underside of the cookie).  Then, take the circle cut-out cookies and gently place on top.
  8. Dress with powdered sugar or not – they’ll look beautiful either way. Enjoy with a cup of tea and make sure to snap a pic.

Details: Makes about 2 dozen cookies

*Note 1: Luke and I find that dipping our Linzer cookie cutters in flour makes it easier to keep the cut-out shapes intact.

*Note 2: If you don’t have or don’t want to buy special Linzer cookie cutters, you can use different sized circle cookie cutters.  A 3-inch circle cookie cutter can be used for the bottom and you can use a 3-inch and 1-inch cookie cutter to create the cut-out top.  You’ll have lack the variety of shapes, but still have very classy cookies.

To print the recipe, click here: Jam Cookies