When the temperature starts to rise in New York, I ditch red wine for chilled rosé and mix margaritas more merrily and frequently (I drink margaritas year round, but summer makes this behavior 100% acceptable). The summer beverage Luke and I especially love is the Aperol Spritz. Sipping on our spritzes, I like to imagine sitting at a little bar somewhere in Rome or in Florence along the Arno, enjoying an aperitivo as the sun sets. Our vermillion drinks matching the faded, orangey hues, of the surrounding ancient buildings. How lovely does that sound??
Cherry Clafoutis is a dessert that’s easier to make than properly pronounce. My mom’s directions for making clafoutis are as follows: “pour palačinke batter over cherries and put it in the oven.” The only messy part of this recipe is pitting the cherries – a task I didn’t particularly enjoy as a 5 year old child. I realize now why my mother’s directions for clafoutis are so straight-forward. She leaves out the part where I do all the grunt work and end up covered in cherry juices.
Because Hillary and I are too structured of people to actually follow the palačinke batter + cherries advice, we use Mimi Thorisson’s recipe from A Kitchen in France. Mimi actually doesn’t pit her cherries, which is something my pre-k self would have been very happy about. If you’d rather not throw caution to the wind, try these pitting methods or pick up a special pitter.
Ingredients:
3 1/2 TBS unsalted butter, melted and cooled + extra butter for cake pan
1 LB cherries, pits removed
3/4 cup all-purpose flour
1/3 cup granulated sugar
pinch of salt
1 vanilla bean, split lengthwise and seeds scraped
3/4 cup + 1 TBS whole milk
4 eggs
Powdered sugar for *dusting*
Directions:
Preheat the oven to 400°F.
Pit the cherries either with a pitting tool or using a chopstick.
Butter a 9 inch round cake pan. Arrange the cherries in the bottom of the pan.
In a large mixing bowl, mix together the flour, sugar, salt, and vanilla bean seeds.
Whisking gently, add the milk and then eggs (one by one). Add the melted butter and whisk until the batter is nice and smooth. Pour the batter over the cherries.
Bake for 15 minutes. Lower the oven temperature to 350°F and bake for another 30ish minutes.
Place the pan on a rack and let cool for at least 1 hour.
I learned something new while preparing to write this post. I learned that Jody Williams has another restaurant in the West Village. A restaurant that somehow I had never heard of (whaaaat). I knew about Buvette, which has previously inspired some home cooked meals, and Via Carota, her collaboration with Rita Sodi. Somehow I missed Gottino, the oldest of the bunch and quite possibly the most understated. It has a cute patio and a long spacious bar. It looks very appetizing compared to the squished “bistro” seating I’ve endured at Buvette, all for the sake of their delicious tartinettes.
There are few foods items I enjoy more than tartinettes (also known as crostinis) – a crusty piece of toast topped with a creative combination of cheese, meat, and/or vegetables. This walnut pesto is one such creation and comes originally from Gottino, but is now served at Buvette as well. Having it at Buvette for the first time, I knew I would love it forever. The rendition Luke and I make at home is very nearly as good. If I could I would eat this for dinner often – several large spoonfuls on crispy toasts with just a simple mixed green salad. Unfortunately, Luke doesn’t consider walnut pesto tartinettes substantial enough for dinner. I encourage you to enjoy walnut pesto for lunch, happy hour, dinner, maybe even breakfast. Our recipe comes from Deb Perelman. I also love this succinct recipe writeup from The New York Times in 2008, which omits ingredient measurements. Jody Williams has been serving walnut pesto for nearly ten years! That is the strongest endorsement of this recipe’s deliciousness.
Ingredients:
1 cup shelled walnuts (optional: toast and let cool)
1/4 cup grated parm
1 clove garlic, peeled and crushed or grated
fresh thyme (strip a few sprigs and give ’em rough chop)
salt, to taste
splash of red wine or sherry vinegar
1/3 cup olive oil
2 TBS minced sun dried tomato (oil packed or dry will work, if using oil packed can go a little lighter on the olive oil)
sliced baguette
Directions:
Using a mortar and pestle or food processor, grind walnuts, cheese, garlic, thyme, salt, and vinegar. Stir in olive oil and tomatoes.
Toast your baguette slices (cut fairly thin, 1/2 inch or so). Heap a generous spoonful of pesto onto your warm slices and enjoy immediately.
Pesto can be stored at room temp for up to a week.
Dijon mustard is one of the most versatile ingredients in your fridge. Sadly, the small Maille or Grey Poupon jar often sits in condiment asylum with months-old bottles of ketchup, mayonnaise, and salsa. It’s time to break your mustard loose from hot dog hell. The world of marinades, dressings, glazes, slaws, and sauces awaits! A grainy Dijon mustard plays a starring role in this roasted pork loin recipe. Used along with brown sugar and herbs, the mustard glaze gives the meat amazing flavor and texture. To double-down on the Dijon, make a quick side salad of arugula dressed with a mustard vinaigrette. Previously unused and unappreciated, your jar of Dijon will definitely be feeling itself after this meal.
This marinade comes from Marian Burros of the NYT. The overnight marinating is not mandatory but definitely recommended. We opted for pork loin instead of pork tenderloin, as called for in the original recipe, and modified the cooking time. But this works really well for pork tenderloin too! And if you’re curious about the difference, read more here.
Ingredients:
2 lb pork loin
3 TBS brown sugar
2 TBS grainy Dijon mustard (if you don’t have grainy Dijon, smooth Dijon will suffice, you’ll just lose some of the texture)
2 tsp rosemary and/or thyme, chopped
2 cloves garlic, minced
2 TBS cooking sherry or red wine vinegar
Directions:
Make the marinade. In a small mixing bowl, combine brown sugar, mustard, rosemary, thyme, garlic, and sherry/vinegar.
Place pork loin in a plastic bag or shallow bowl. Pour the marinade over the meat and turn to coat well. Let the pork loin marinate in the fridge overnight. If you’re pressed for time, you can marinate for as little as 30 minutes.
Preheat oven to 400°F. Line a medium-sized baking sheet with foil. Place the loin fat side down unto the baking sheet. This can also be done in a well oiled cast-iron skillet.
Roast for 25 minutes. The fat side will have developed a nice crust. Turn fat side up and roast for another 25 to 30 minutes. To test doneness, you can insert a thermometer into the center of the loin. The internal temperature should read 155°F.
Remove from oven and let loin sit for 10 minutes. Cut crosswise into thin slices.
A simple pan-sauce can be made by deglazing the meat juices in a skillet or saucepan. Luke’s special recommendation: use leftover meat to make a classic roast pork sandwich the next day.
Details: Serves 4 or 2 for dinner plus 2 for lunch sandwich leftovers.
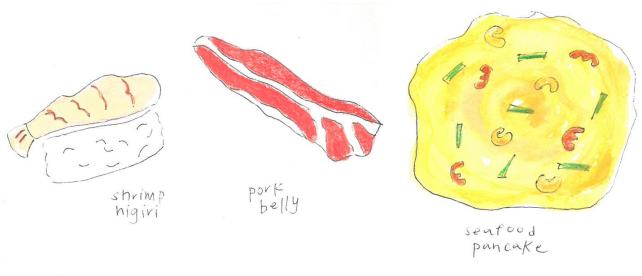
I took a big trip recently. Two weeks to Seoul, Kyoto, Hakone, and Tokyo. My first time traveling to Asia and my first time traveling abroad since college . The two weeks went by surprisingly quickly, as they always do. And now I’ve been back in New York for two weeks neglecting Pig n’ Pie (and all of our loyal fans!) and still reflecting on my trip. It’s taken me so long to sit down and write something because 1) we don’t actually have oodles of loyal fans patiently waiting (if you are reading this, thank you) and 2) I’ve been ashamed to admit that I made some blunders and embarrassing decisions while traveling. I ate western food more than once. I went to Starbucks (but not McDonald’s, never that). I only had one meal devoted solely to sushi. Navigating the foodscape in Korea and Japan was hard! I didn’t anticipate the struggle. And I’m not always the best dealing with the unexpected.
In the past, not being able to find that restaurant on the 8th floor of an unmarked building in Shinjiku would drive me crazy. I’d be wandering past many totally acceptable dining establishments, moronically set on finding the restaurant I read about in the guidebook. I didn’t do that this time.
I let go a little bit and I let Korea and Japan humble me. You can’t fully experience Korean and Japanese cuisine in your first visit! That’s crazy talk. Both of these countries have incredibly rich, thoughtful, and historical approaches to food. So maybe I’ll pull a Dev alla Master of None, but instead of Italy move to Tokyo to master the art of sushi making. But more seriously, I am going to take more risks cooking, without cursing myself when the results are subpar. And I’m going to make kimchi! Very unoriginal of me to choose the archetypal example of Korean food, but I’m starting with the classics. Plus, I’ve already listened to a podcast, which in millennial speak means I’m basically an expert.
Lunch al Desko seems to be the new hot thing these days. It’s the simple idea of bringing in leftovers or making your lunch instead of buying the same basic Sweetgreen salad/California roll/Deli panini. Despite sparking ridiculous “challenges” like #Cook90, I’m in full support of the ham sandwich’s newfound trendiness. My favorite office lunch happens to be an upscale version this classic brown bag staple. I’ll usually make a prosciutto & mozzarella sandwich when I already have one or more of the ingredients at home. Let’s say there’s some arugula and bread from last night’s dinner; at Noon, I’ll run out to Whole Foods for mozz, prosciut, and peppers. These three ingredients cost just as much as salad or sushi, and there will be leftovers for an pre-dinner snack.
Economical, resourceful, and delicious, Lunch al Desko definitely deserves its recent buzz. Admittedly, the prosciutto & mozz sandwich is my definition of “best.” So tell us your favorite office lunch in the comments! But it better not be “1 can of chickpeas.”
Ingredients
Prosciutto
Fresh mozzarella, sliced into 1/4 inch slices
1 roasted pepper, sliced into strips
Arugula, or whatever greenery you have on hand
Long roll, ciabatta, or baguette
Pesto, optional
Olive oil & red wine vinegar, optional but recommended
Salt & pepper
Directions
Pro-tip: try to get the roasted pepper from the grocery store salad bar. Pour the olive oil and vinegar into the same container as the roasted pepper.
Prep the mozzarella, prosciutto, arugula, and pepper on a plate. Cut bread lengthwise. If using, spread pesto on the bottom half.
Layer on prosciutto, mozzarella, roasted pepper, and arugula. Drizzle oil and vinegar, sprinkle salt and pepper.
Mastering a chocolate tart recipe sort of makes you feel like you could pull off the eternally enviable style of Parisian women – you are Patricia, the beautiful American heroine of Breathless. That, “I woke up this stylish and put-together” look. Seemingly effortless and simple, but at the same time tailored and unique. Parisian style is unassuming, beautiful, and beguiling. For years us American woman have been trying to crack the code. Serving this chocolate tart to guests, you’ll elicit a similar response. They’ll be thinking, “It’s so simple, but so good and I’m not sure how I can recreate this for myself.” This tart is perfect all on its own – no need to accessorize with whipped cream or ice cream. The filling is silky smooth chocolate, but with just the right amount of bite. And you’ll only need a sliver. There’s a lot of decadence in a tiny portion.
The inspiration for this recipe comes from David Lebovitz, a Parisian emigrate and our favorite ex-pat food writer. We used a crust recipe from Amanda Hesser, though David has his own as well (which we are sure is great).
Ingredients (Crust, makes 2):
8 oz (2 sticks) unsalted butter, softened + extra for greasing
1/2 cup granulated sugar
1 egg yolk
1/2 tsp milk
12 oz (about 2 1/3 cup) all-purpose flour
1/4 tsp salt
Chocolate Filling:
1 1/4 cup granulated sugar
6 TBS warm coffee
4 oz unsalted butter, cubed at room temperature
pinch of sea salt
4 oz bittersweet or semisweet chocolate, chopped
2 oz unsweetened chocolate, chopped
2 large eggs
1/4 cup flour
1 tsp vanilla extract
Directions:
Make the crust. In a mixing bowl, cream together butter and sugar. Add the egg yolk and milk and beat to combine. In a separate, medium bowl combine the flour and salt. Slowly add the flour to the butter mixture, stirring until completely blended. Gather dough into 2 balls and wrap each in plastic wrap. Freeze one for a later date and chill one in the fridge for at least 1 hour.
Heavily butter a 10-inch tart pan with a removable bottom. Make sure to butter all the nooks and crannies. Roll out the dough and press the dough into the pan, patching up the sides and trimming the edges as needed. Prick the bottom with a fork and place in the freezer for 30 minutes.
Prebake the tart shell. Preheat the oven to 375°F. Remove tart from freezer, fill with pie weights, dried rice, dried beans to prevent the crust from puffing up. We use a lot of coins! And line the crust with parchment paper or a buttered piece aluminum foil before pouring in coins or weights. Bake until golden, 20-25 minutes.
While prebaking, make the chocolate filling. Spread sugar in an even layer in the bottom of a large, heavy-bottomed saucepan or dutch-oven. Cook the sugar over medium heat until the edges liquefy and begin to caramelize. Using a heatproof utensil, gently drag the liquified sugar toward the center of the pan. This encourages the sugar to melt evenly.
Once the sugar is melted it will caramelize fairly quickly. When it starts to smoke, but before it burns, turn off the heat and stir in the coffee. Be careful when you do this; wear oven mitts and don’t stand too close to the pan. The mixture will bubble and seize up a bit. If the caramel has seized up a bit, stir it gently until smoothed.
Add the butter and salt and stir until melted. Then add both chocolates and stir until smooth. Once smooth, mix in the eggs, then the flour. Finally, stir in vanilla.
Pour the mixture into the pre-baked tart shell. Bake 15-20 minutes, just until the filling starts to rise and crack at the edges but the center is still jiggly. Don’t over bake!
Remove from oven and let cool completely before slicing.
You can enjoy with some whipped cream or vanilla ice cream, but it truly is delicious all on it’s own!
Charlie Bird is one of those New York restaurants. It’s been around for over ten years!! That’s a feat in New York. And it still manages to have a newfangled feel. Lots of fresh ingredients, incredibly inventive dishes. The food is delicious. But…Charlie Bird is one of those New York restaurants – small plates, not so small prices. Luke and I have been only once and it was when my parents were in town. Special dinner for a special occasion. Our lives and salaries don’t really warrant dinners at Charlie Bird. Prior to our dinner, having done my research, I knew the farro salad was a Charlie Bird favorite. But sitting down for dinner and perusing the menu, there were so many other amazing options. Farro, being a humble grain, just wasn’t all that appealing! I don’t regret this decision. Dinner was perfect. And thanks to Melissa Clark, we were able to replicate the farro salad at home. Though we could never claim that our version is as good as Charlie Bird’s, we both were able to enjoy very sizable portions!
Ingredients:
1 cup farro
1 cup apple cider
2 tsp kosher salt + more to taste
2 cups water
2 bay leaves
6 TBS olive oil
juice of 1 small lemon (about 3 TBS)
about 1/3 cup shaved parm (you can use a vegetable peeler to shave)
2 big handfuls of arugula
1 cup parsley, roughly chopped
1 cup mint, roughly chopped
3 radishes, thinly sliced
3/4 cup cherry tomatoes, halved
Directions:
In a medium saucepan, bring farro, apple cider, water, salt and bay leaves to a simmer. Simmer until farro is tender (it will still have a little bit of chew) and the liquid has evaporated, about 30 minutes. If the liquid evaporates before the farro is done cooking, add a bit more water. Let farro cool and then discard the bay leaves.
In a salad bowl, make the dressing. Whisk together lemon juice, olive oil, and a pinch of salt. Add cooled farro and cheese and mix well. This mixture can sit for a couple of hours at room temperature, or overnight in the fridge. When ready to eat, mix in the arugula, herbs, tomatoes, and radishes. Top with flaky sea salt, to taste.
Details: Serves 4-6. This is a hearty salad and can be eaten as a main course! Serves 4 as a main, 6 as a side.
When planning our meals for the week, Hillary and I always keep an eye out for the shrimp sale at Whole Foods. Any opportunity at double-digit discounts shouldn’t go to waste, especially on these precious prawns. In order to always take advantage of the sale, we have an eclectic roster of shrimp dishes to satisfy any particular craving. The first (and easiest) recipe in this trio of dishes provides the dry spice of cumin, paprika, and cayenne. Next is the butter+oil+garlic+wine+lemon formula for classic shrimp scampi. The last dish, a Thai inspired yellow curry, takes some more time and ingredients, but will probably end up being the star of your weekday menu. Not surprisingly, these three recipes, along with the previously shared Hot n Honey version, come from true masters of the weekday dinner: Mark Bittman and Melissa Clark. We hope you share our excitement next time you see “YOU SAVE: $11.99 /lb” on some fancy shrimp at WF.
The Simplest and Best Shrimp Dish – Mark Bittman
¼ cup olive oil
4-5 garlic cloves, cut into slivers
1 lb shrimp, peeled, deveined, and dried
Salt and ground black pepper, to taste
1 tsp ground cumin
2 tsp hot paprika
½ tsp cayenne (optional)
¼ tsp turmeric (optional)
Chopped parsley for garnish (optional)
Prep spices on small plate and make sure shrimp are dry.
Pour oil into a large skillet, swirling the oil so that it covers the bottom of pan. Turn heat to low and add garlic. Cook until the slivers turn golden, about 2 minutes.
Raise the heat to medium-high and add the shrimp. Add your plate of spices to the pan. Stir to evenly distribute the spices and then leave alone. Shake the pan a couple times over 5 minutes. Shrimp will be nicely coated and pink.
Garnish with parsley and serve with white rice.
Shrimp Scampi – Melissa Clark
2TBS butter
1TBS extra-virgin olive oil
3garlic cloves, minced
⅓ cup dry white wine
½ tsp salt
Pinch of red chili flakes
Pinch of fresh ground black pepper
1 lb large shrimp, peeled and deveined
¼ cup chopped parsley
Juice of half a lemon
Pasta or bread
Melt butter with olive oil in a large skillet over medium-low heat. Add garlic and stir constantly until fragrant, about 1-2 minutes.
Add wine, salt, chili flakes, black pepper and bring mixture to a simmer. Let it reduce by half, while stirring. This should take just 1-2 minutes.
Add shrimp and saute until just pink, about 2-4 minutes. Add parsley and squeeze in lemon juice and stir to incorporate. Enjoy with pasta or bread!
Shrimp in Yellow Curry – Mark Bittman
2 TBS neutral oil, veggie or canola will do.
1 cup finely chopped onion
1 TBS minced garlic
1 TBS minced ginger
1 tsp red pepper flakes or fresh chilies
1 TBS curry powder
13.5 oz can coconut milk
1 lb medium-large shrimp, peeled and deveined
Salt and ground black pepper to taste
2 TBS fish sauce
¼ cup minced cilantro/mint leaves for garnish
¼ cup chopped peanuts for garnish
Prep onion, garlic, ginger, chilies and make sure canned coconut milk is stirred.
Pour oil into large, deep skillet and turn heat to medium. Add onion, garlic, ginger and chilies and stir frequently making sure veggies don’t burn. After 5-8 minutes, the mixture should be soft and pasty. Add curry powder and cook for another minute.
Pour in coconut milk and raise the heat to medium-high. The mixture will get nice and bubbly. Stir occasionally until almost all liquid has evaporated.
Add the shrimpy’s and salt + pepper. Stir frequently, the shrimp will release their liquid, making the mixture more curry-esque again. Cook until shrimp turn pink.
Add 1 TBS of the fish sauce and taste. Add more if you’d like. Serve on top of white rice, garnished with chopped cilantro or mint and peanuts. I like to add some chili garlic sauce for an extra kick.
This recipe, which we sourced from Nigella Lawson, has made its way around the web a bit. You can find a version from Deb Perelman of Smitten Kitchen. Martha makes a similar recipe with just two additional ingredients – lemon zest and fresh dill. It’s a tried and true recipe that is welcome to a little tinkering. And like Romeo and Juliet or Jay-Z and Beyonce, buttermilk and chicken are an illustrious couple, most famous of course for the wondrous results of frying buttermilk brined chicken. Buttermilk is such an amazing marinade because it not only imbues flavor, but its acidic composition also tenderizes the meat – double win!! As long as you can remember to whip together this super simple marinade the night before, this chicken recipe comes together real quick and yields flavorful, tender meat with salty, crispy skin. Enjoy with a green salad and some bread to sop up the chicken juices. You’ll feel like you’re seriously spoiling yourself for a weekday dinner.
Ingredients:
4-6 chicken bone-in thighs (or a mix of thighs, drumsticks, wings – important to have bone-in chicken, whatever you choose!)
2 cups buttermilk
1/4 cup + 2 TBS veggie oil (we used canola)
1 TBS freshly ground black pepper
1 TBS sea salt
2 TBS freshly chopped rosemary
1 TBS honey
2 cloves peeled and crushed garlic + garlic cloves with skin on for roasting (optional)
Directions:
The night before, marinate yo chicken! Place chicken in a large freezer bag. Add buttermilk, 1/4 cup oil, salt, crushed garlic, rosemary, and honey. Seal bag securely, mix contents around, and store in your fridge. Chicken can be marinated for up to 2 days.
Remove chicken from marinade and place on rack so excess can drip off. Try to let your chicken rest at room temperature for 30 minutes, or an hour ideally. This will allow your chicken to dry off a bit and come to room temperature, which ensures even cooking and crispiness.
Preheat oven to 425°F. We opted to cook our chicken in our cast iron skillet, but you can also cook on a tinfoil lined roasting pan (tinfoil makes for easy cleanup). Drizzle chicken with 2 TBS of oil. Sprinkle with a bit more sea salt and freshly cracked pepper. Throw the couple cloves of garlic in the skillet as well, if you’d like (they turn soft and are great spread over a slice of bread). Place in oven and cook for 20-25 minutes, or until when chicken is pierced the juices run clear.
Remove from oven and let rest for about 5 minutes. Then enjoy immediately!
Details: Serves 4-ish. Maybe we’re gluttons, but we have a hard time eating just a single chicken thigh per person.